Showing posts with label pizza. Show all posts

11.11.2010

TWO For The Price of ONE!

So I was chatting with a friend the other day about my blog. I told her that I had pictures for 2 meals that I had made months ago and I never got around to uploading and so forth. Well.... turns out I was mistaken. I, in fact, have 4 random meals from the past! These next two recipes are simple and fast (almost no prep!) - GREAT for a weeknight dinner!
First off we have ANOTHER PIZZA! This time it's a pesto pizza. I started out with a whole wheat prebaked crust and spread a layer of store prepared pesto on top.


The toppings for this pizza include fresh tomatoes, artichoke hearts, black olives, green bell pepper, and red onions.


I top my pizza with the veggies, spread some feta cheese on top, pop it in the oven for about 10 - 15 minutes and DING: dinner is served. I usually pair these quick pizzas with a salad. This meal took me a total of 25 minutes from start to finish! Not too shabby!


Next is another trusted recipe from allrecipes.com. Cheese ravioli with tomato and artichoke sauce. (I LOVE ARTICHOKES!) The recipe calls for fresh tomatoes, but to speed things up I used an undrained can of diced tomatoes. To start things out I prep my artichokes and some green onions. I then start to saute all the sauce ingredients which include tomatoes, artichokes, green onions, garlic, salt and pepper. (I added some Italian seasoning to the mix as well.) This is a very simple sauce that was super tasty!
I boil some prepackaged cheese ravioli while the sauce simmers.

Once the ravioli is finished, I drain the water out and mix in half of the tomato and artichoke sauce.


Final steps include plating the pasta, adding some more sauce to the top, and a sprinkle of parmesan cheese! Everyone in the house liked this meal. Matt said I could make it any time I want! I also paired this pasta with a simple salad (my go-to). This meal took me about 25 minutes to complete.


More meals to come! (Maybe.... I start the new term on Tuesday. Hopefully I can find some time for at least one more post this weekend!)

11.09.2010

Adventures In Pizza, Take 3

My apologies for being such a slacker-blogger. Nursing school is in full swing lately and that along with family takes up most of my time! Therefore cooking in general has been placed on the back burner and with the exception of my toaster-oven-lunch-food-creations, I haven't had much to share!


This post is comprised of a White Bean and Spinach Pizza I made a couple of months ago. Since the kitchen has been closed most days, when I do cook I have been trying to focus on healthy options. This recipe was found on the site eatingbetteramerica. They send out e-newsletters and this recipe caught my eye! I LOVE pizza - and if it is sans the red sauce, I am more than willing to try it!


I start out with the food processor (next to the spatula - it's my favorite kitchen tool). I mix together white kidney beans, garlic and fresh ground black pepper. I also added some water to help with the dryness factor.


I spread the white bean and garlic mixture on a prebaked pizza crust (Boboli). Next comes a sprinkle of dried oregano.


I then top the pizza with fresh baby spinach and some sliced sun dried tomatoes.


And finally the cheese goes on top!


The pizza goes in the oven and comes out beautifully! My only complaint is that it was a bit on the dry side. The beans were the culprit. I'm not sure what could be done to remedy this problem besides using less bean mix on the pizza. I also thought some type of dipping sauce could fix the problem. But the type of sauce is beyond me at the moment. Maybe just a simple marinara?


I am off school this week so I am hoping to post some more food-fun! Last night we made mini black bean nacho pizzas (very VERY tasty) and I also whipped up a batch of vegetarian tortilla soup for lunches this week. Later this week I'll be making Italian quesadillas, vegetarian melts, and Matt and I are going to try and recreate Myra's Dionysus's Spicy Black Beans and Rice (we all dig black beans in my family). We'll see if I can get one or more posts up this week!
HAPPY COOKING!

11.10.2009

You Knew It Was Only a Matter of Time...


I 
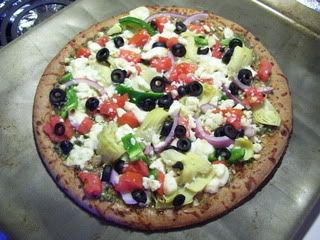
love pizza! It's always a fast way to get dinner on the table, leftovers are tasty, and the possibilities are endless! When it comes to making pizzas, I am a bit of a rebel. Rarely do I make your standard tomato sauce and mozzarella pizza. I am always up for trying unusual and surprising toppings. So I was feeling like pizza last week, but I wasn't feeling particularly creative. I skimmed through allrecipes.com (go figure) and found this 
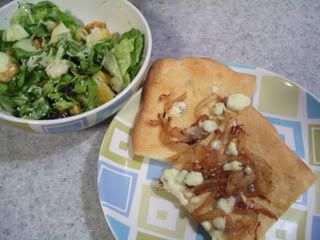
Caramelized Onion and Gorgonzola Pizza. To add some veggies to my meal, I paired the pizza with this Winter Fruit Salad with Lemon Poppyseed Dressing.


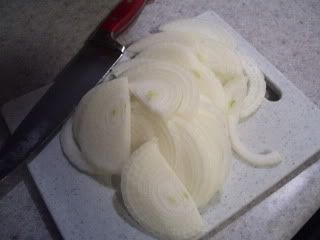
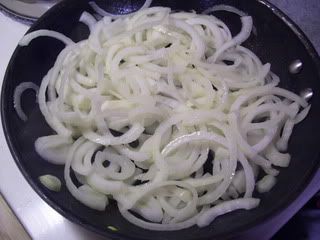
I pretty much followed the recipes exactly, only making small changes here and there and I will note them as I go along. To start out, I slice one large sweet vidalia onion.


After heating a bit of olive oil in a warm skillet I add the entire onion to start the caramelizing process. This takes a total of about 20-25 minutes.


As the onions are doing their thing in the skillet, I have Ronnie spread the pizza crust out on a cookie sheet for a little pre-bake and I start to prepare the salads. To save some time, I did not make the homemade lemon poppyseed dressing the recipe calls for. I used bottled dressing instead - and I have to say it was still a mighty tasty salad!


I top some romaine lettuce with shredded Swiss cheese, cashews, and raisins (I didn't have any dried cranberries on hand - so I figured raisins are an okay substitute!) You'll notice Ronnie's salad in the back - he would never go for all this stuff on his salad (though he would totally eat all of it on it's own - it's a mixing thing possibly)... I guess I am lucky he eats salad at all!


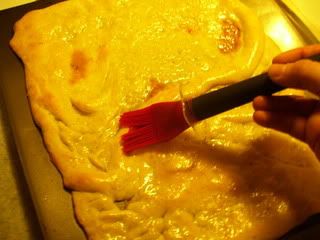
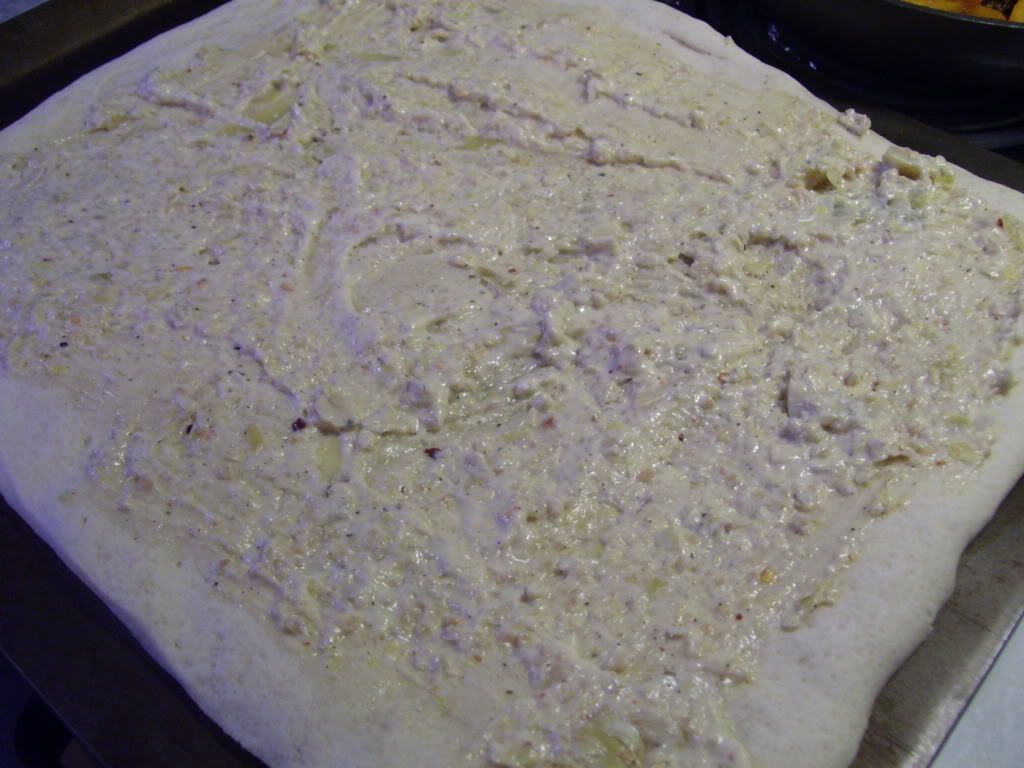
This part isn't in the original recipe, but I felt like the pizza needed some type of base... So I brush a light coating of olive oil on the crust after it comes out of the "pre-baking" stage. I pre-bake my crust for about 6 minutes allowing for a crispier crust in the end!


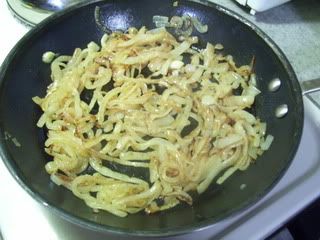
Once the onions start to brown I add a little over 1 teaspoon of sugar and let the onions cook for a couple more minutes. When I first saw this part, I was like, WHAT!? Sugar? But seriously, it worked out great and I wouldn't skip this part!


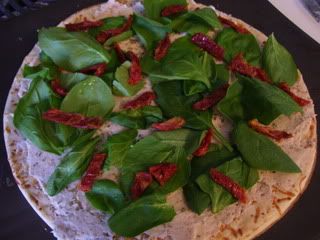
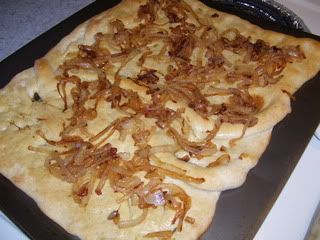
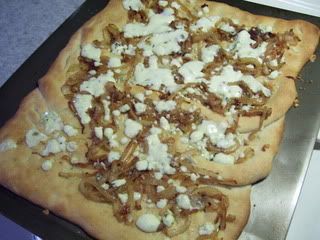
I spread the now fully caramelized onions over my pizza crust... Notice Ronnie's corner: onion-free! I laugh with Matt all the time how as Ronnie gets older I am sure I'll be the talk as the mom who makes all the weird food in the neighborhood... Oh well! They don't know what they're missing!


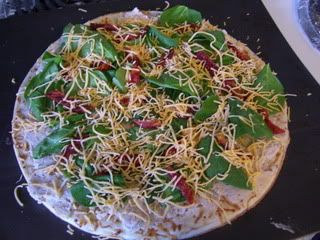
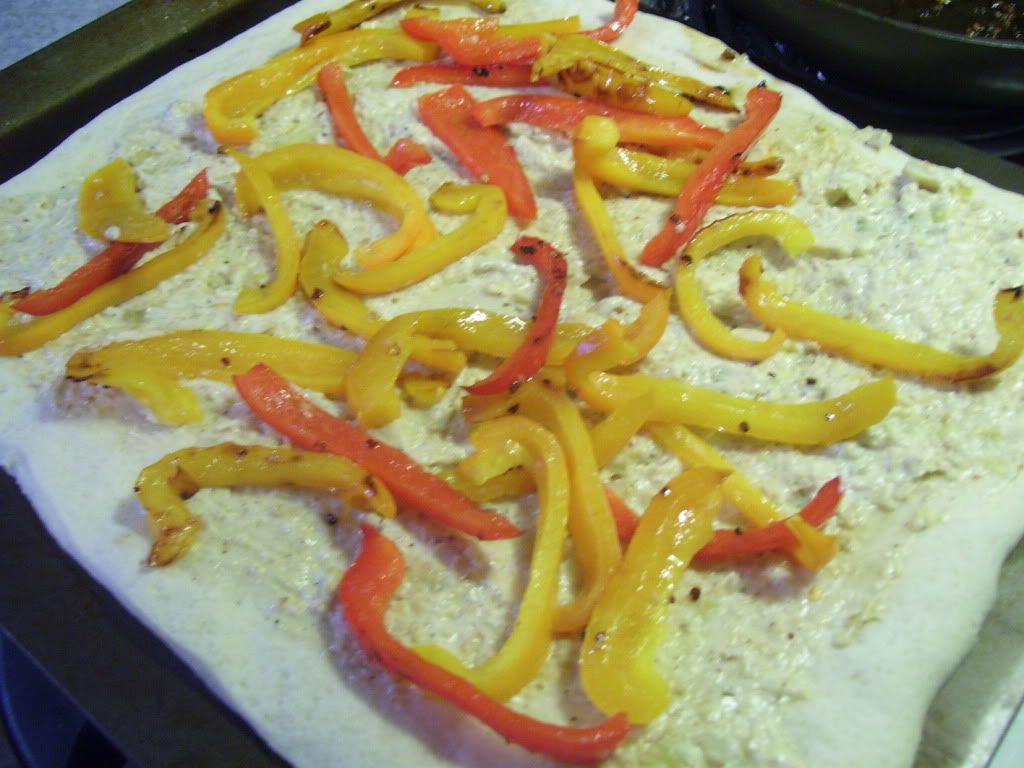
Per some suggestions I read about in the review section of the recipe, I halved the gorgonzola cheese, only topping it with about 4.5 oz. Then I stick it in the oven for about 8 more minutes.


While the pizza is in the oven I chop my pear and apple and add it to the salad!
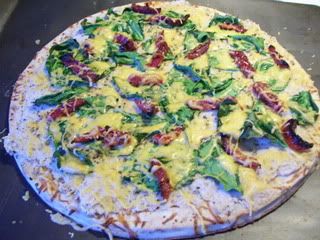
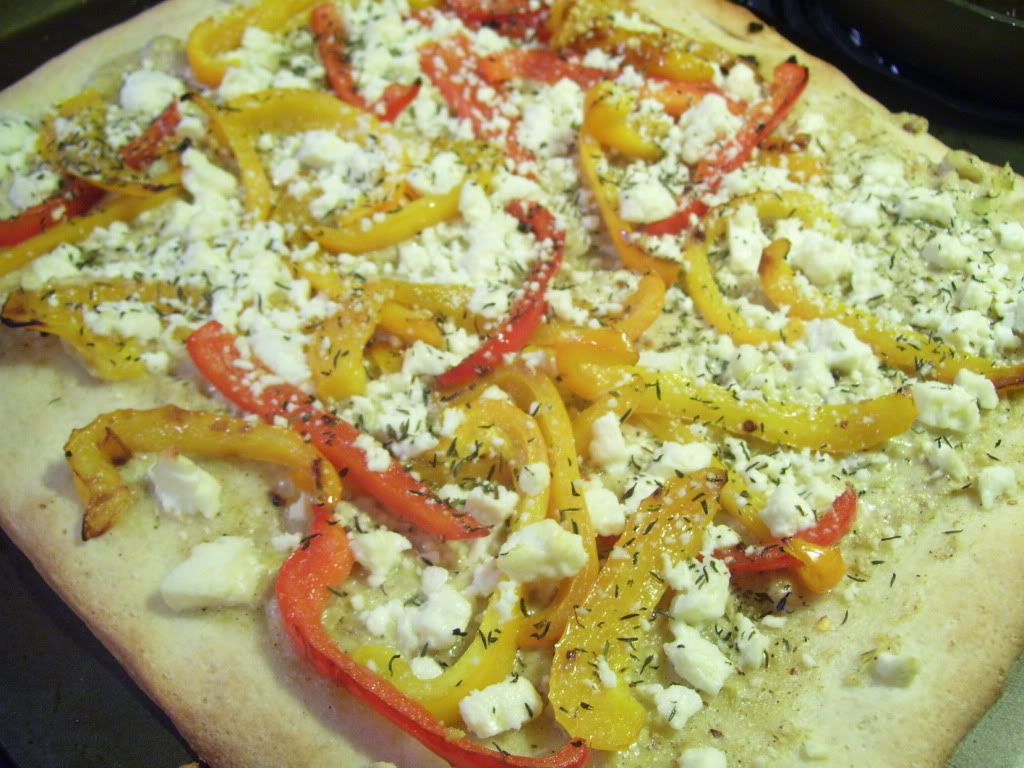
When the time is up I remove the pizza from the oven. The cheese is nice and melted, the crust is a perfect shade of brown and we are all getting hungry!


Topping the salad with the bottled poppyseed dressing and mixing it all together is my final step before we all dig in! What a tasty meal! Thoughts: The pizza really was fabulous! The taste was very unique BUT the next time I make this I will prepare it for like a party appetizer or snack by cutting it into smaller, easy to handle, squares. It just wasn't satisfying enough to be a meal-type pizza - but Matt and I enjoyed it a lot so I definitely want to make it again, just in a different setting. The salad was AWESOME! Even Matt, who doesn't normally like "fruity" salad or poppyseed dressing, really enjoyed it and asked me to make it again soon!


I start classes up again next week.... I have to be honest and say I am not 100% looking forward to it. I took a break from the early fall term and now I am spoiled again! BUT - we are going to Pittsburgh this weekend to watch Notre Dame (hopefully) kick some Panther butt! Should be a fun weekend! I am making a mock tuna salad for the tailgating. I am excited about that too!
My next post will be a spicy vegan potato curry I have been making for a while now. It is so good and easy, anyone can make curry with this recipe! Get ready for it!

8.16.2009

Fancy-Smancy Pizza

At my old place I would have never, ever, EVER displayed on the internet the cabinet I kept all the main cooking ingredients in. It used to be in two cabinets actually, and one of them was called "the cabinet we don't talk about" because when you opened it, usually about 3-6 things would come tumbling out. Now that I have my new space with a bigger kitchen I LOVE my new cabinet! I love it so much, that I wanted to share it with everyone! And seriously, I should have invested in a lazy-susan a LONG time ago! Those things ROCK! So here ya go - this is where it all begins...

Today's post includes a pizza and some fried eggplant. If you know me, you know I LOVE to make pizzas. And not just any 'ole pizza, I love to experiment with new ingredients and toppings almost every time, and this day was no exception - Artichoke-Pepper Pizza with Feta Cheese!
For the fried eggplant, I began by soaking cubed eggplant in some salt water for about 15 minutes.


While the eggplant was soaking, I start sauteing a red and yellow bell pepper I cut into strips with a little bit of olive oil and minced garlic.


For the base of my pizza, in the food processor I add a jar of drained artichoke hearts, 1/4 cup of low-fat mayo, crushed red pepper flakes, freshly ground pepper, and some more minced garlic (because who could ever get enough of that stuff?) I then pulse it all together until it is well mixed.


Once the 15 minutes is up for the soaking eggplant, I drain the water and dry the cubes with a paper towel. After they are nice and dry I toss the eggplant with corn meal and freshly ground pepper.


And into a heated skillet with a little bit of vegetable oil the eggplant goes! This is the first time I have made fried eggplant, and it actually fried up a lot easier than I expected. You just have to toss every few minutes and they are good to go.


I almost always use the Pillsbury ready-made pizza crust for my pizzas. I find that they are equally tasty and easy, and you can almost always find them on sale or a coupon to use. I also always bake the crust for about 6 minutes before I add the toppings and put it back into the oven; it makes for a crispier crust.
So... While the eggplant is frying, I start to top the pizza. First things first, I spread the artichoke mixture on top of the precooked crust.


Next on goes the sauteed peppers and garlic.


And finally I top the pizza with some feta cheese and dried thyme. Into the oven for about 8 minutes it will go!
As I stated before, the eggplant fried up beautifully. I have to admit though - the eggplant was not a big hit... None of us finished it. I think next time I will heat up some tomato sauce to pour on top of it. It was just kind of plain and needed something to go with it.

The pizza out of the oven looks great and ready to eat!


All in all, it was a wonderful meal. The pizza was superb! It could pass for any fancy pizza parlor-pizza! Though the eggplant wasn't as good as I wanted it - I think I could do better with it next time!
Pizza also makes a GREAT leftover for lunch the next day! It was good then too!!!