11.17.2009

After a long search, I finally found one!

I am embarrassing myself a bit here and admitting that I never had Indian food till I met my fiance. Yeah, I know - a Cincinnati native where there are Indian restaurants on every corner downtown and on the east side... But somehow I never got around to trying it.
For our first official date out (2 years and 9 months ago - crazy how time moves), Matt took me to Clifton's Ambar India on Ludlow and ever since then I have been completely hooked! Seriously, I feel like I could eat there at least once a week, but my pocketbook won't allow it as the prices aren't that cheap! So, not too long ago I thought I would try preparing Indian food myself. My first attempt went horribly wrong and it was a long time till I tried it again. Trying recipe after recipe, I could never get the authentic taste to happen in my own kitchen. Then I found this recipe: Spicy Vegan Potato Curry. Not only does this recipe give me that Indian flavor that I have grown to love, it is also SUPER easy (it's almost no prep - you only chop potatoes and onions), and SUPER tasty! I serve the curry over rice and have nan bread on the side for the extra sauce!!!
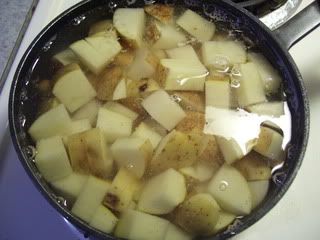
To start out, I cube about 5 potatoes and boil them in salted water for about 15 minutes.

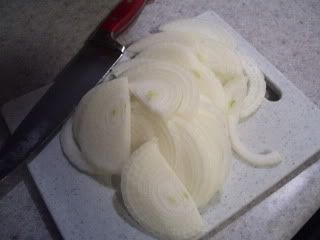
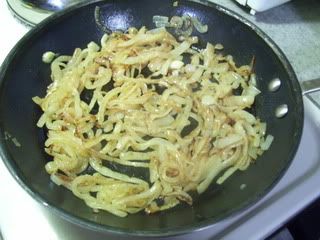
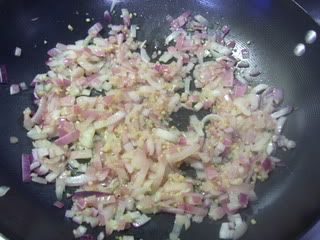
While the potatoes are cooking, I heat some olive oil in my wok (woks: not just for Chinese food!) and add 1 medium chopped onion and a couple spoonfuls of minced garlic.


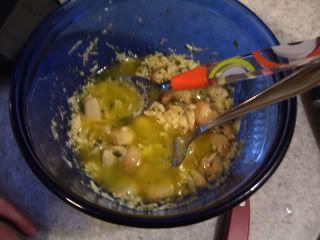
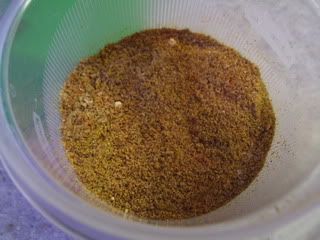
Here is something kind of different I like to do, when preparing a recipe that requires a lot of spices, I like to get them all measured and mixed together in a small dish so I am not reaching for different things in my cabinet while also trying to measure and stir. It just seems to make the job a lot easier for me when I am trying to do 7 different things at once. Here you'll find all the different spices that make this curry wonderful: cumin, cayenne, curry powder, garam masala, ginger, and salt. It really is a perfect combination for a homemade curry!


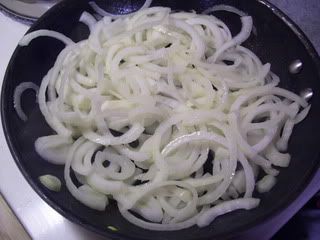
Once the onions are tender, I add the entire mix of spices. I let the spices cook together for about 5 minutes before I add the remaining ingredients. Be sure you keep the mixture moving in the pot, otherwise it starts to stick and burn, which is never good!


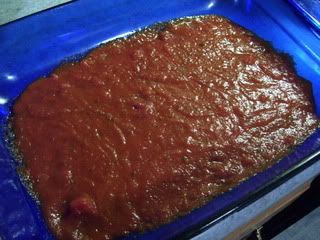
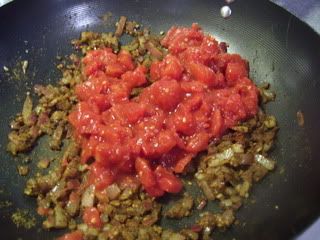
The first addition to the curry in an undrained can of diced tomatoes.


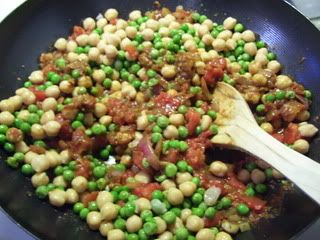
After the tomatoes have been mixed in, I add in a can of drained and rinsed garbanzo beans, and about 3/4th's cup of thawed and drained frozen peas. This is also about the time I drain my potatoes in the colander...


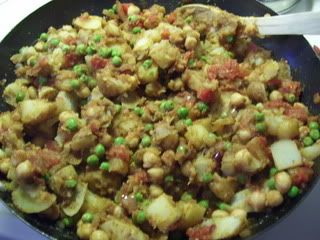
And then I dump those into the curry mix! Mmmm - potatoes! The kitchen is really starting to smell good as everything starts to cook together. Also - while all of this is going on, I am cooking some rice as well (didn't think a picture of cooked rice was necessary).


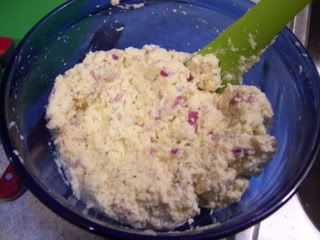
I mix everything quite well, and some of the soft potatoes start to mash a little - you want this! It helps make the curry have a nice creamy texture!


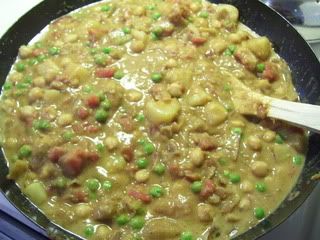
And now for the final touch - I add a 14 oz can of coconut milk. If you are planning on making this (and quite frankly you are silly if you don't) DO NOT, and I repeat DO NOT substitute regular milk. The coconut milk is key to the curry's texture and flavor. I let this all simmer for about 10 more minutes and then it is time for dinner!!!


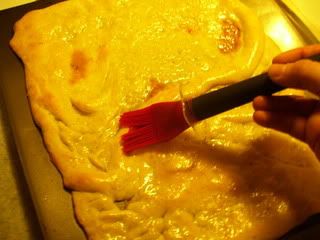
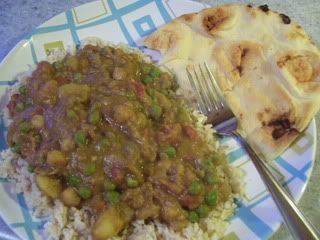
As I stated before, I serve this curry over rice with some nan on the side. This particular recipe makes a HUGE batch. Enough for Matt and I to have dinner and lunch the next day, along with freezing some for later. I cannot be more serious when I say this dish is FABULOUS! If you are like me and have failed at Indian cuisine before - try this tonight and I promise it will be a win!!!


Next post, a truly original Luckey's Lunch sandwich - Jalapeno Melts!!! See ya soon! (And wish me luck! I started the new term at Cincinnati State yesterday!)

11.10.2009

You Knew It Was Only a Matter of Time...


I love pizza! It's always a fast way to get dinner on the table, leftovers are tasty, and the possibilities are endless! When it comes to making pizzas, I am a bit of a rebel. Rarely do I make your standard tomato sauce and mozzarella pizza. I am always up for trying unusual and surprising toppings. So I was feeling like pizza last week, but I wasn't feeling particularly creative. I skimmed through allrecipes.com (go figure) and found this Caramelized Onion and Gorgonzola Pizza. To add some veggies to my meal, I paired the pizza with this Winter Fruit Salad with Lemon Poppyseed Dressing.


I pretty much followed the recipes exactly, only making small changes here and there and I will note them as I go along. To start out, I slice one large sweet vidalia onion.


After heating a bit of olive oil in a warm skillet I add the entire onion to start the caramelizing process. This takes a total of about 20-25 minutes.


As the onions are doing their thing in the skillet, I have Ronnie spread the pizza crust out on a cookie sheet for a little pre-bake and I start to prepare the salads. To save some time, I did not make the homemade lemon poppyseed dressing the recipe calls for. I used bottled dressing instead - and I have to say it was still a mighty tasty salad!


I top some romaine lettuce with shredded Swiss cheese, cashews, and raisins (I didn't have any dried cranberries on hand - so I figured raisins are an okay substitute!) You'll notice Ronnie's salad in the back - he would never go for all this stuff on his salad (though he would totally eat all of it on it's own - it's a mixing thing possibly)... I guess I am lucky he eats salad at all!


This part isn't in the original recipe, but I felt like the pizza needed some type of base... So I brush a light coating of olive oil on the crust after it comes out of the "pre-baking" stage. I pre-bake my crust for about 6 minutes allowing for a crispier crust in the end!


Once the onions start to brown I add a little over 1 teaspoon of sugar and let the onions cook for a couple more minutes. When I first saw this part, I was like, WHAT!? Sugar? But seriously, it worked out great and I wouldn't skip this part!


I spread the now fully caramelized onions over my pizza crust... Notice Ronnie's corner: onion-free! I laugh with Matt all the time how as Ronnie gets older I am sure I'll be the talk as the mom who makes all the weird food in the neighborhood... Oh well! They don't know what they're missing!


Per some suggestions I read about in the review section of the recipe, I halved the gorgonzola cheese, only topping it with about 4.5 oz. Then I stick it in the oven for about 8 more minutes.


While the pizza is in the oven I chop my pear and apple and add it to the salad!
When the time is up I remove the pizza from the oven. The cheese is nice and melted, the crust is a perfect shade of brown and we are all getting hungry!


Topping the salad with the bottled poppyseed dressing and mixing it all together is my final step before we all dig in! What a tasty meal! Thoughts: The pizza really was fabulous! The taste was very unique BUT the next time I make this I will prepare it for like a party appetizer or snack by cutting it into smaller, easy to handle, squares. It just wasn't satisfying enough to be a meal-type pizza - but Matt and I enjoyed it a lot so I definitely want to make it again, just in a different setting. The salad was AWESOME! Even Matt, who doesn't normally like "fruity" salad or poppyseed dressing, really enjoyed it and asked me to make it again soon!


I start classes up again next week.... I have to be honest and say I am not 100% looking forward to it. I took a break from the early fall term and now I am spoiled again! BUT - we are going to Pittsburgh this weekend to watch Notre Dame (hopefully) kick some Panther butt! Should be a fun weekend! I am making a mock tuna salad for the tailgating. I am excited about that too!
My next post will be a spicy vegan potato curry I have been making for a while now. It is so good and easy, anyone can make curry with this recipe! Get ready for it!

11.02.2009

Comfort Food For a Monday Night!


I am an avid list maker. I make grocery lists, menu lists for a week's worth of food, to-do lists, gift-shopping lists, if there is a list to be made - I am in the shadows making it (or out in the open sometimes - I'm crazy like that!) Anyway - wanting to make something Italian for dinner soon (because it's Ronnie's favorite and a sure way to make him eat up all of his dinner) while making my grocery list I couldn't decide on a lasagna or manicotti. Manicotti won after asking some people for their opinions and HERE WE GO: Manicotti comin' right at cha!


This manicotti is extremely simple and actually comes together fairly quickly. I paired the manicotti with a new garlic bread recipe I spied on allrecipes.com, Roasted Garlic Bread - and YUM-O, am I glad I did! To start the meal out, I cut the top halves off of 3 bulbs of garlic. Sprinkle them with a bit of olive oil, and just as the recipe says, stick them in a 350 degree oven for about 30 minutes. This is also when I open the window in the kitchen - though it smells pretty good - roasting garlic can be a bit over-powering to sensitive noses! I then can move onto preparing the manicotti.


My filling for manicotti involves a pint of ricotta cheese, 2 cups of mozzarella, a handful of parmesan, an egg, half of a finely chopped red onion, garlic powder, basil, oregano, a bit of parsley, and a few twists from my black pepper mill. No need to add salt, the tomato sauce has plenty of it for the whole meal.

One thing I did not take a picture of, (because really, who wants another boring picture of pasta boiling), are the manicotti noodles. For this particular recipe, I only cook the manicotti noodles about halfway (5 minutes tops). This allows for a sturdier noodle when filling it with cheese, and the time in the oven afterwards is enough to cook the noodles all the way through - plus it's a time saver! Love those!


So - by now the manicotti noodles have been removed from the water and drained and we are ready to start stuffing!!! First things first, I cover the bottom of my 9X13 pan with half of my tomato sauce.

Who says "piping-bags" are just for pastries?!?! NOT ME! Using a big ziplock bag, I fill it with the cheese mixture, cut the corner off and fill my manicotti noodles with ease! Don't make the same mistake I have before by cutting the hole too big - remember the rule (and this is a GREAT rule that can be applied to a lot of different things) you can always take off more but you can never add it back once it's been cut! Anyway - if you cut the hole too big, it ends up taking almost just as long to fill because it gets messy. But if you cut the hole in the corner of the bag slightly smaller, it's really easy to stick it in the noodle - squeeze - and you are filled and ready for the next one! Pretty nifty huh?

I arrange all the noodles in the dish, cover them with the remaining sauce, and top with a bit more parmesan. By this time, the roasted garlic is ready to come out. So I swap the garlic for the manicotti in the oven for about 45 minutes.

I let the garlic sit and cool so it is easy to handle with my bare hands. This is exactly when Ronnie made his way into the kitchen, "mmMMmm - that smells delicious Mama" were his exact words. It really is hard to resist the smell of roasting garlic... too bad for Vampires. So, now that Ronnie likes the smells coming from the kitchen, he is ready and willing to help! We melt a stick of butter in the microwave and once it is done we simply squeeze the bulbs of garlic. The cloves easily plop out of the bulb into the butter and that's pretty nifty too!


Simply following the recipe - our garlic bread topping consists of a stick of melted butter, the 3 bulbs of roasted garlic, a handful of parmesan cheese, and some chopped parsley. We used a fork to mash the garlic cloves and mixed everything together.


A large loaf of french bread is cut into halves and we spread the garlic butter mixture over the two halves. We could already tell at this point that dinner was going to be good!
After washing a few dishes to help Matt out (I'm the cooker (for the most part), he's the dishwasher) the manicotti is ready to come out of the oven. I switch the broiler on and throw (okay - not literally) in the garlic bread.


Almost every time I cook - I learn a little something. Monday night was no exception! Next time I will lower the top rack so my edges don't get burnt by the broiler. It says 5 minutes and I kept a close eye on it and ended up taking it out a little early so I wouldn't totally ruin the bread. Regardless - obviously - it still turned out FANTASTIC!


Serve these up with a salad and you have a GREAT comfort food meal that would be hard not to please everyone! Really easy - a bit time consuming - but well worth it for sure!


I am thinking of switching my picture-provider-uploader-service-whatcha-ma-call-it. Currently I use photobucket - but lately service has been slow and my picture's don't always upload to blogger... Any suggestions? I was thinking of trying picasa?
Till next time! Have fun in the kitchen!!!