1.24.2010

Green Soup! (But not the kind you're thinking of.)

While checking up on family and friends on facebook, I saw that my aunt had posted a recipe that she wanted to try, Avocado Soup, from GMA's 10 Things You Should Eat. Being the avocado-lover that I am, I was instantly curious. After looking over the ingredients and directions, I decided this would be a perfect weekend lunch for my family, and with a few tweaks, Matt and I (not so much Ronnie - too "green" for him) GREATLY ENJOYED this awesome avocado soup!
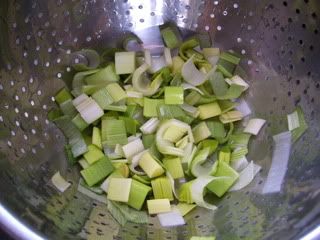
First things first, the leek. For those of you that have never worked with leeks, it's basically like working with a really big green onion. Seriously, it's super easy and don't let the unknown intimidate you with this vegetable. I cut off both the rooted end and the tough green ends of my leek. I then cut the leek right down the middle, and proceed to chop. TIP - You'll find that leeks have hidden mud and dirt in them once you start chopping, so I always save the wash for after I am done chopping by soaking it in a bowl of water for a minute (to loosen the dirt) and then rinsing in a colander afterwards.
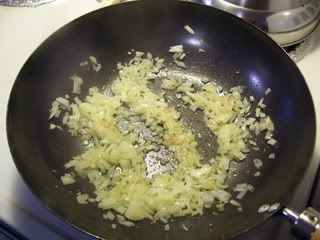
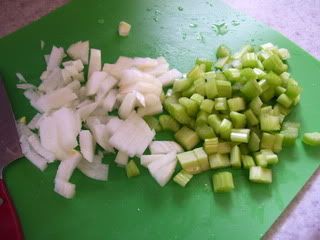
When I am done prepping my leek, I prep my other vegetables, a few celery stalks and a white onion.


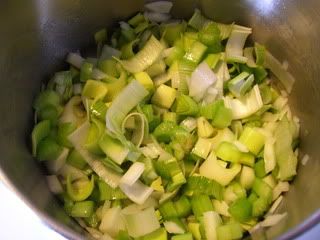
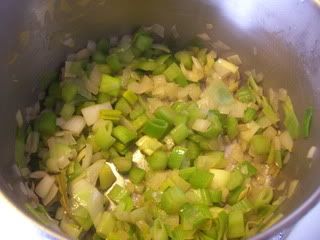
I follow the directions by heating some olive oil in my soup pot, but I also add a bit of minced garlic to the olive oil. Once it is hot, I add the leeks, celery, and onion to saute for about 8 minutes.


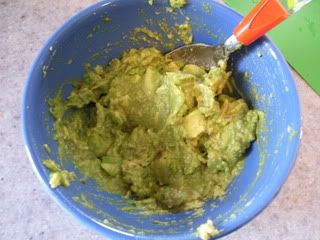
While the veggies are getting soft, I cube and mash a large avocado.


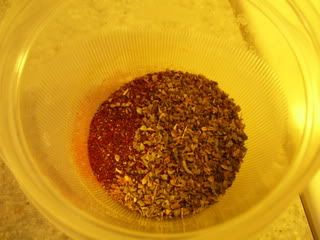
Once the veggies have been softened, I add the bay leafs, coriander, and cumin. I actually used about a whole teaspoon of cumin and though this version turned out tasty - next time I am going to add some chili powder at this point as well. I give the seasoning about 2 minutes to get hot before I add the remaining ingredients.
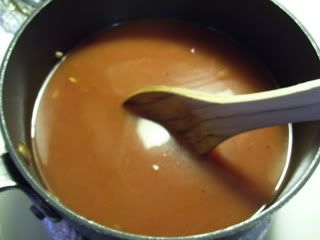
Now it's time to add the vegetable broth (called for chicken broth, but obviously I changed that), the mashed avocado, and lime juice.


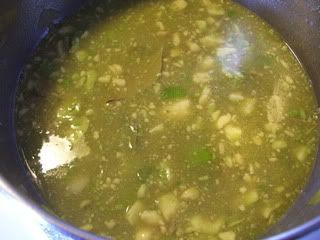
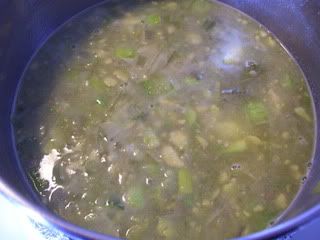
Instead of the ten minutes suggested, I let my soup go for about 20 minutes. It's kind of cool to see that as it heats, the avocado kind of disintegrates and starts to turn the soup a nice green color. When I am ready to serve, I remove the soup from the heat and season with salt and pepper.


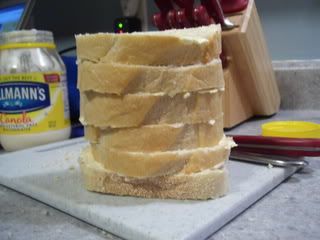
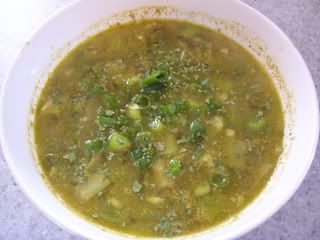
Finally, I ladle the soup up and top it with some cilantro (all I had was dried at the time) and chopped green onions. We paired this soup with one of those pull-apart cheddar loaves you get from the bakery. YUM! Super good to dip in the soup.


For the easiness and healthy factors of this soup - it is definitely a keeper! As stated before, I'll add some chili powder next time. TRY IT! Leeks? Avocados? Don't let it distract you from this awesome find!

1.17.2010

TOUCHDOWN!!!

Busy, busy, busy!!!! The holidays combined with working and going to school make it hard for me to keep the blog current. My apologies to anyone out there in cyberspace that likes to check up on Luckey's Lunch regularly. I will say this though - after today's post, I just have to upload some pictures and I'll have two more posts ready to go (an avocado soup and calzones from scratch). So check back for those soon!


I know the Super Bowl is coming up, so I thought I would post a few appetizers I have made lately that are truly crowd pleasers. First one up - Cowboy Caviar. This is actually a combination of two recipes where I only took the ingredients that suited my tastes. I just made this for a birthday party this past weekend and it was a hit!!! I had several people ask me for the recipe! So - here it is people!


Cowboy Caviar, Luckey's Style
  • 1 (15 oz) can of black beans, drained and rinsed
  • 1 (15 oz) can of black eyed peas, drained and rinsed
  • 1/2 to 1 cup of frozen corn (depending on how much you like corn), thawed and patted dry
  • 1/2 chopped onion
  • 1 (4oz) can of diced jalapeno peppers
  • 1 (14.5 oz) can diced tomatoes, drained
  • 1 cup of Zesty Italian dressing
  • 1/2 teaspoon of garlic salt
  • 1/2 teaspoon of cayenne pepper
  • 2 avocados
In a medium bowl, combine the beans, peas, corn, onion, jalapeno peppers, and tomatoes. Season with the Italian dressing, garlic salt, and cayenne pepper. Cover and refrigerate for at least 4 hours. Right before serving, cube the avocados and add them into the bean mix. Serve with tortilla chips. ENJOY!


Next up is a twist on your average artichoke dip, Artichoke and Roasted Red Pepper Dip (<--- click on the name for the recipe). Instead of using spinach, this one adds in roasted red peppers and leeks. As you might have guessed, I spied this recipe from allrecipes.com and followed the recipe pretty closely. All I did differently was add some minced garlic to the hot oil and added about 2 more tablespoons of mayo. This is something GREAT to make up ahead (minus the baking), stick it in the fridge till you're ready to pop it in the oven and eat! I served this particular dip with plain pita chips, though I think next time getting the parmesan or garlic style ones would be AWESOME!


And finally for your Super Bowl party needs, whats a party if there is no chip dip!?!?! Green Onion and Ranch Dip is a PERFECT pick! Once again, allrecipes.com was the source of this find and WOW! This dip packs a green onion punch - but the good kind. I followed the recipe exactly and I mixed everything really well in my food processor. Honestly, I don't think I'll ever buy chip dip again because not only was it packed with good flavor, it was super easy to make too!!! I served this dip with carrot and celery sticks, along with ruffled potato chips. Pretzels would be good too!


See - you thought you would be stressing about what to make for your Super Bowl party... Not anymore!!! Try them out for yourself, I promise that people will be asking for the recipes!!!
Till next time - have a fun party!


12.14.2009

Feliz Navidad!

Luckey's Lunch LOVES Mexican food! There is no getting around it! I will take every opportunity I can to try out a veggie-fied Mexican dish. This post consists of Black Bean Soft Tacos and Mexican Rice!
To start the dish out I heat some oil in a skillet and add the rice to brown. The rice takes about 45 minutes to complete and is the longest part, so I start this out right away!
While the rice is browning I add some salt and cumin powder. I let this keep going for about 10 minutes.


I then stir in some chopped onions and cook about 5 minutes more.

After the onion has been softened I add in tomato sauce and vegetable broth, bring it to a boil, cover and let it simmer for about 25 minutes, keeping the lid on the entire time.

As I am getting the rice started, I also prep the black bean soft tacos. As I usually like to do, I get all my spices and herbs together. This particular recipe uses chili powder, cumin, oregano, salt, garlic powder, and freshly ground pepper. I also drain and rinse two cans of black beans, slice an avocado, and chop an onion.


I start out by cooking the onions and some minced garlic in my wok. I LOVE my wok! If you don't have one, I HIGHLY recommend it! It is completely versatile and works great when I need a large, deep skillet.


When the onions are soft, I add in everything else: black beans, a can of diced (undrained) tomatoes, a can of chopped green chilies, and my collection of spices and herbs.


Everything gets mixed together well and then cooked together for about 10 minutes. If it wasn't for the rice, this might be one of the fastest home cooked meals ever attempted (and it's tasty too!)


Once the beans are done, the rice is ready to go and I fluff it with a fork.


Onto a warmed tortilla the bean mixture goes - and I top it with some shredded cheese and avocado slices. If you are thinking about skipping the avocado - DON'T!!! This adds such a great soft and creamy texture to the taco, they wouldn't be as good without it! The Mexican rice also keeps well in the fridge and makes GREAT leftovers!


I can honestly say this is a meal Ronnie really likes. So much so that during dinner he'll make comments like "This is delicious!" and "MmmMMM!" If Ronnie likes it - you will too! Guaranteed!!!


So.... holidays, school, work, football season... Life has just been one big whirl of activities! We'll see what it allows me to come up with next!? (Maybe when would be more appropriate!)
Happy Holidays and have fun in the kitchen this season!

12.03.2009

Some Like It HOT, (with a little bit of fungus on the side)

Oh. My. Gosh. Life has been a bit nonstop since I have started school back up... Hence why this is my first post in a couple of weeks. But, as promised, here I am with a Luckey's Lunch original, Jalapeno Melts. No, this is not your average healthy vegetarian sandwich, but it sure is tasty, and as you might of guessed from the name, this sandwich can pack some heat!
When we were in Florida earlier this year, we ate at a steak house that advertised $14.99 prime rib dinners on Thursdays only (ya know, we were sitting on the beach and spied a plane pulling a banner?). So, knowing my fiance, we were headed there that night. It actually ended up being this really fancy place, we were entirely underdressed, but how were we supposed to know that from a banner on the beach?! Anyway - the reason for my story was they had these burgundy mushrooms that were to-die-for! Wow! I wish I could eat some right now! So I have been craving these mushrooms ever since. I found a marinated mushroom recipe and decided to try it. Instead of serving them cold, I served them right away and they were tasty! Not as good as the ones in Florida... but an acceptable substitute!
To start out the mushrooms, I mix in a sauce pan red wine vinegar, olive oil, sliced onions, salt, parsley, dry mustard, brown sugar and garlic.

When the mixture has begun to boil, I add in petite button mushrooms. I let this go on low throughout the entire preparation of the meal. (About 25 minutes total.)


Now it's time to start the melts. I am making just two sandwiches here and to do that I need about 1/2 of a small onion sliced cooking in a skillet with a little bit of olive oil and minced garlic.


While the onions are caramelizing, I slice sour dough bread for the sandwiches. Sure, you could use any type, but the sour dough really is the way to go!!! I always have a hard time finding sliced sour dough at the grocery, so I usually just buy it from the bakery.


By this time, the onions for the melts are ready to come out of the skillet. I usually set them aside on a paper towel lined plate. Now it's time to start cooking the "burgers". When I want a "normal" burger taste, I ALWAYS go for these - Morning Star Farms Grillers Original (or the Grillers Prime, those are good too). Matt and I have, in the past, tricked traditional meat-eaters with these burgers. Not only do they have a very distinct meaty-taste, the texture is pretty right on as well.


So, into the skillet the burgers go! They are really simple to cook if you have never ventured in veggie-burger land before. Just flip them every few minutes until they are browned!


I take a quick peak at the mushrooms and they are looking good!!! A nice pleasant vinegary smell is starting to fill the room and I am okay with that!


Okay, now, as the burgers are going, I prep my bread. These are melts, so there is going to be some frying involved. I butter one side of the bread (that will be the outside) and spread mayo on the opposite. I stack the bread so it's easy to handle and doesn't smear butter or mayo all over the place. I also get out my flat skillet and warm it up for the melting time.


The assembly of the sandwiches is quite simple. Bread (butter side down), mayo, burger, pepperjack cheese, grilled onions, sliced jalapenos, mayo, bread (butter side up)!


Flipping these sandwiches takes a little practice and/or skill. I've made them so many times, its no big deal any more. (Ronnie's cheese and pickle only burger is on the left, the jalapeno melts are way too hot for him.)
The mushrooms are ready to go at this point, along with the melts. All there is to do now is plate up and eat!
MMMmmmMMMmmm.... yummy, gooey, spicy jalapeno melt!!! This is a truly quick and easy dinner. Try it on a busy week night for sure!
As I said before, these mushrooms were really good. I want to make them again and actually follow the direction by chilling them and then I'll probably add them to a salad or something.

Hopefully I can keep school work under control and the posts will be become normal again! Till next time friends!!!